GitLab + Keycloak: Passwordless SSO with a YubiKey
I recently set up a self-hosted GitLab instance on a Hostinger VPS, and from the start I wanted authentication to be passwordless. Passwords are fine — until they aren’t. I wanted to tap a YubiKey or use the fingerprint sensor on my MacBook Pro to log in, and I didn’t want Keycloak exposed to the public internet to make it happen.
The result: GitLab delegates all authentication to Keycloak via OIDC. Keycloak runs on-prem in my k3s cluster. The two talk over Tailscale. Users log in with a YubiKey tap or Touch ID — no password ever hits GitLab.
What is Keycloak? Link to heading
Keycloak is an open-source Identity and Access Management (IAM) solution. Instead of every application managing its own login, they all delegate to Keycloak. Keycloak handles authentication and tells the application “yes, this user is who they say they are.”
It supports OpenID Connect (OIDC) and SAML, and has first-class support for hardware security keys via WebAuthn/FIDO2. In this setup, GitLab never handles credentials — it just trusts what Keycloak says.
Architecture Link to heading
- Keycloak runs in k3s on-prem, never exposed to the public internet
- Tailscale provides private networking between GitLab and Keycloak
- HTTPS is terminated by the Tailscale operator via a Let’s Encrypt cert (required for WebAuthn)
- GitLab uses OIDC to delegate authentication — it never sees credentials
- Users authenticate with a YubiKey tap (or Touch ID as a fallback)
Infrastructure Link to heading
| Component | Location |
|---|---|
| GitLab Omnibus | Hostinger VPS |
| Keycloak | k3s on-prem (via Helm) |
| Postgres | k3s on-prem (bundled with Helm chart) |
| TLS / Ingress | Tailscale operator (Let’s Encrypt cert auto-provisioned) |
| Storage | Longhorn (default StorageClass) |
Prerequisites Link to heading
Before starting, you’ll need the following already in place:
- A running k3s cluster (on-prem)
- Helm installed and configured against your cluster
- The Tailscale operator installed in the cluster with a Tailnet connected
- Your GitLab Omnibus instance running on a VPS and joined to the same Tailnet
- A Tailscale hostname for Keycloak (e.g.
keycloak.tail<id>.ts.net)
1. Install Keycloak via Helm Link to heading
I’m using the CloudPirates Keycloak chart, which uses the official Keycloak image. I ran into image availability issues with the Bitnami chart, so I switched.
values.yaml:
keycloak:
  adminUser: admin
  adminPassword: <use secret>
  hostname: https://<your-keycloak-tailscale-hostname>
  production: true
  proxyHeaders: xforwarded

database:
  username: keycloak
  password: <use secret>

postgres:
  enabled: true
  auth:
    database: keycloak
    username: keycloak
    password: <use secret>
helm upgrade -i -n keycloak --create-namespace keycloak \
  oci://registry-1.docker.io/cloudpirates/keycloak --version 0.20.0 \
  -f values.yaml
Note: The passwords are in
values.yamlhere for clarity. Move them to Kubernetes secrets in production.
Keycloak takes 60–90 seconds to fully start even after the pod shows Running. Be patient before hitting the admin UI.
2. Tailscale Ingress (Required for TLS) Link to heading
WebAuthn requires HTTPS — it will not work over plain HTTP, even on a local network. The Tailscale operator Ingress resource handles HTTPS termination with a Let’s Encrypt cert.
Gotcha: The service annotation approach (
tailscale.com/expose) does not provision TLS. You must use an Ingress resource.
apiVersion: networking.k8s.io/v1
kind: Ingress
metadata:
  name: keycloak
  namespace: keycloak
spec:
  ingressClassName: tailscale
  rules:
    - host: keycloak
      http:
        paths:
          - path: /
            pathType: Prefix
            backend:
              service:
                name: keycloak
                port:
                  number: 8080
  tls:
    - hosts:
        - keycloak
This gives you https://<your-keycloak-tailscale-hostname> with a valid cert — the https:// in values.yaml is what makes Keycloak generate correct redirect URLs. Without the scheme, you’ll get redirect loops.
3. Configure Keycloak Link to heading
Create a Realm Link to heading
When you first log into Keycloak, you’ll land on the master realm admin console:
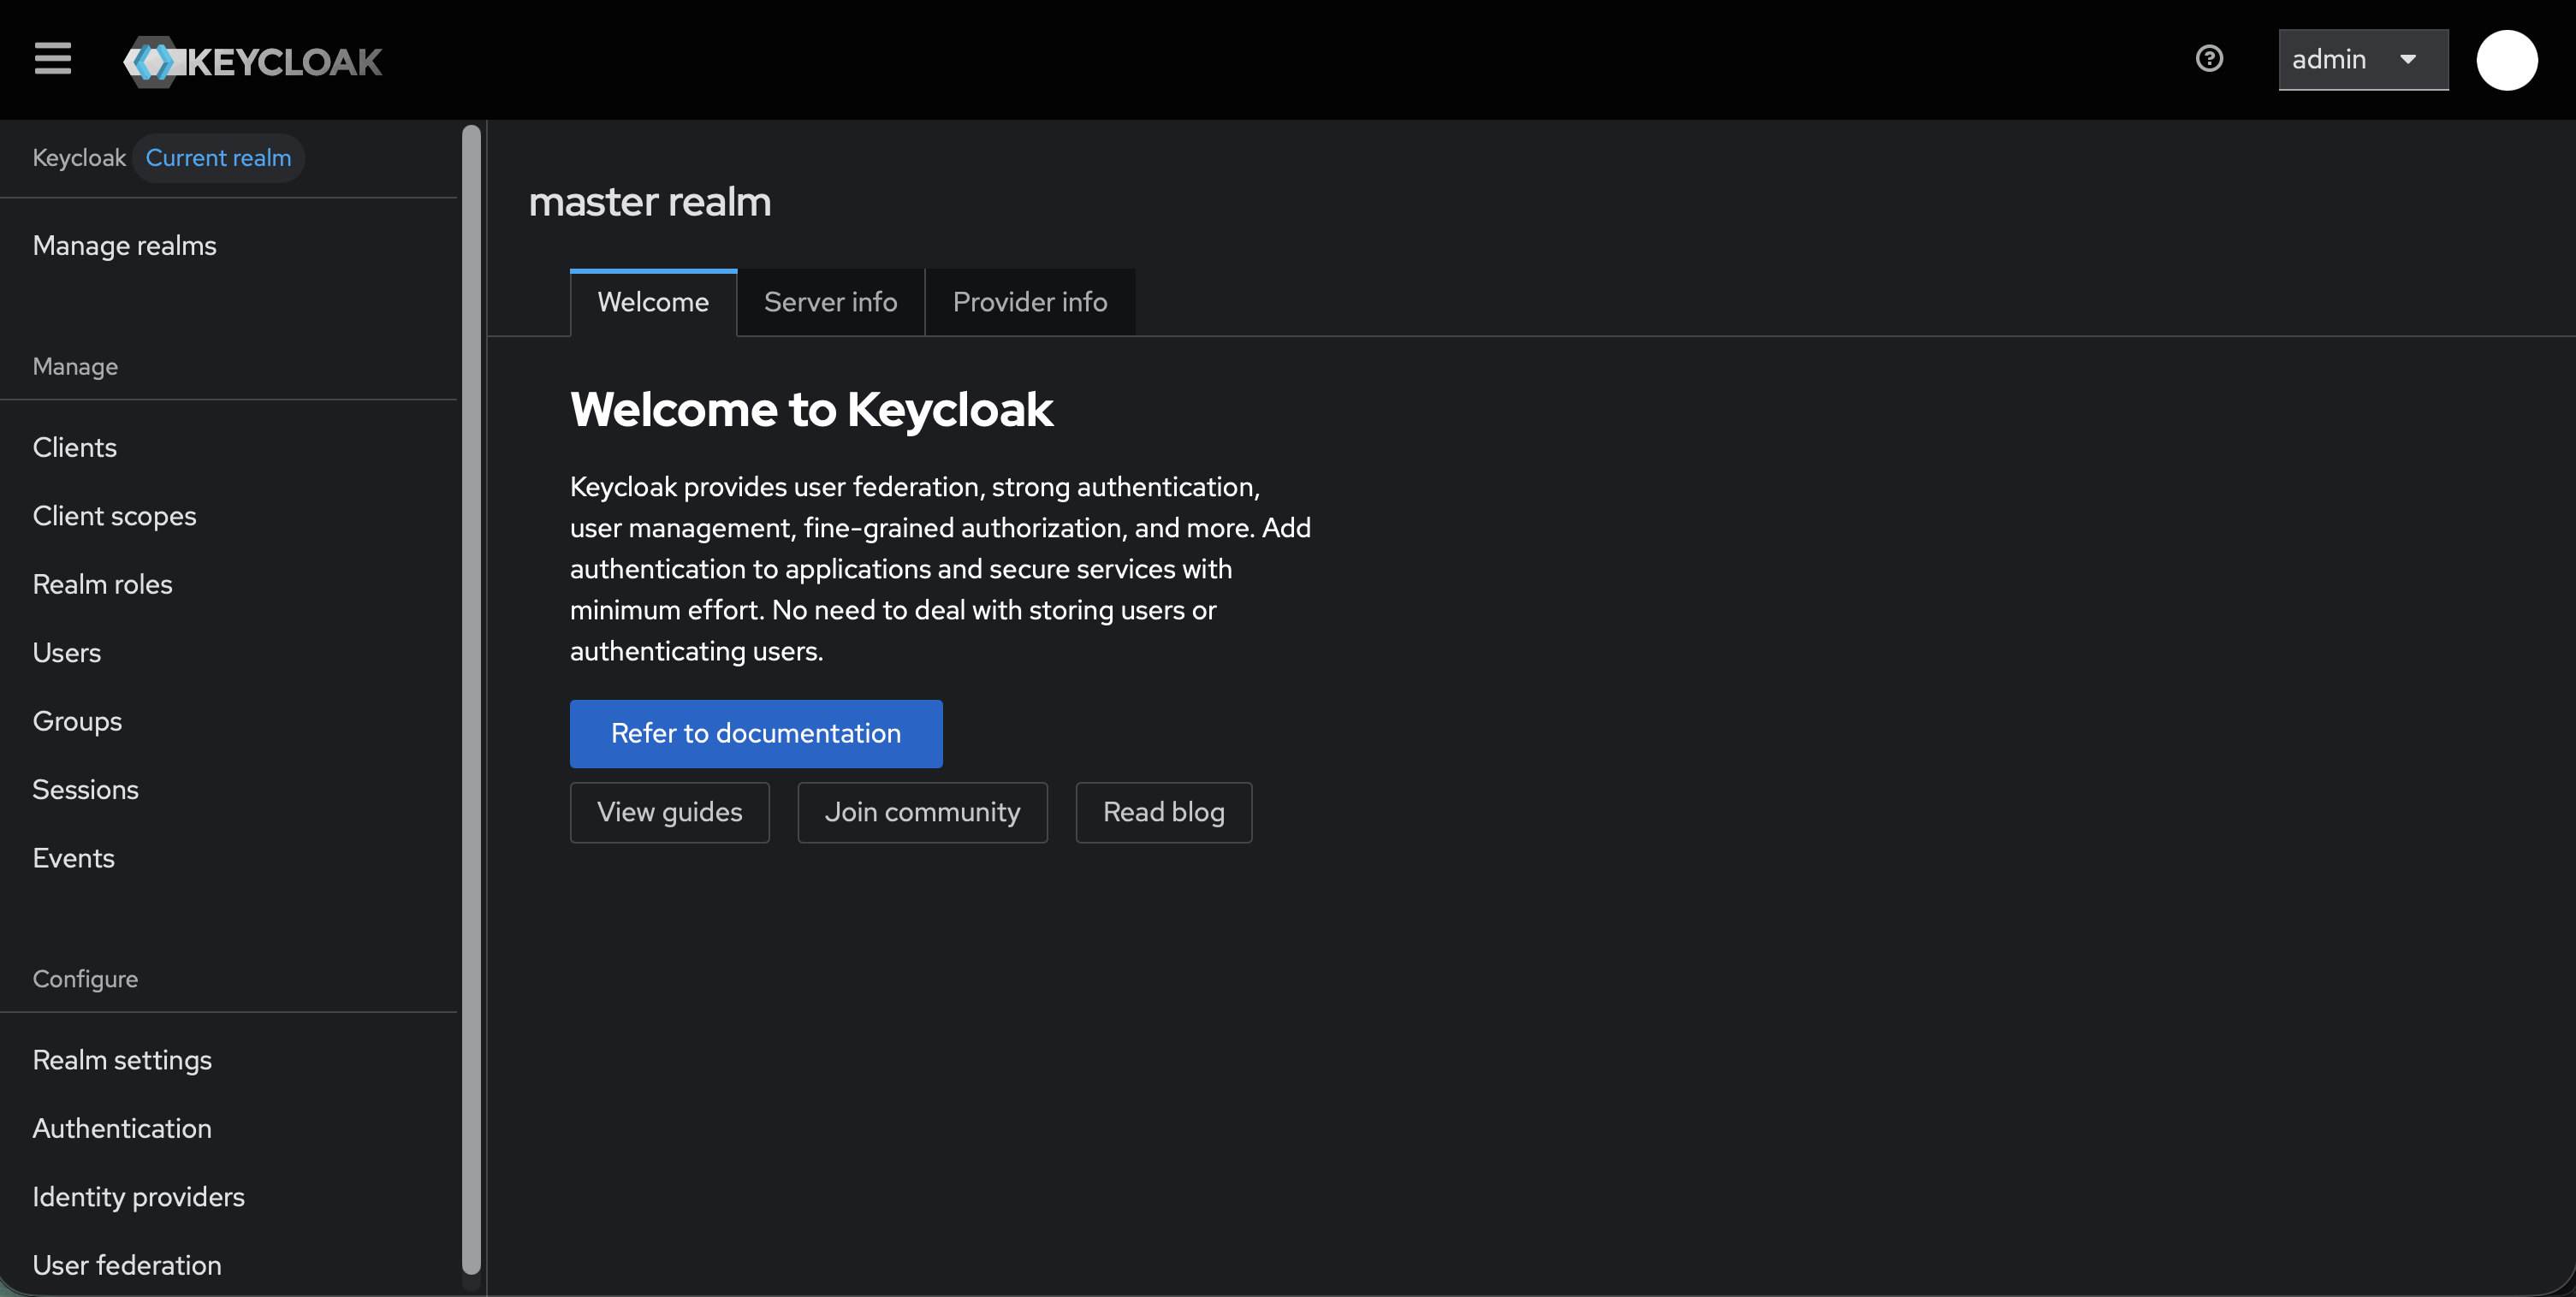
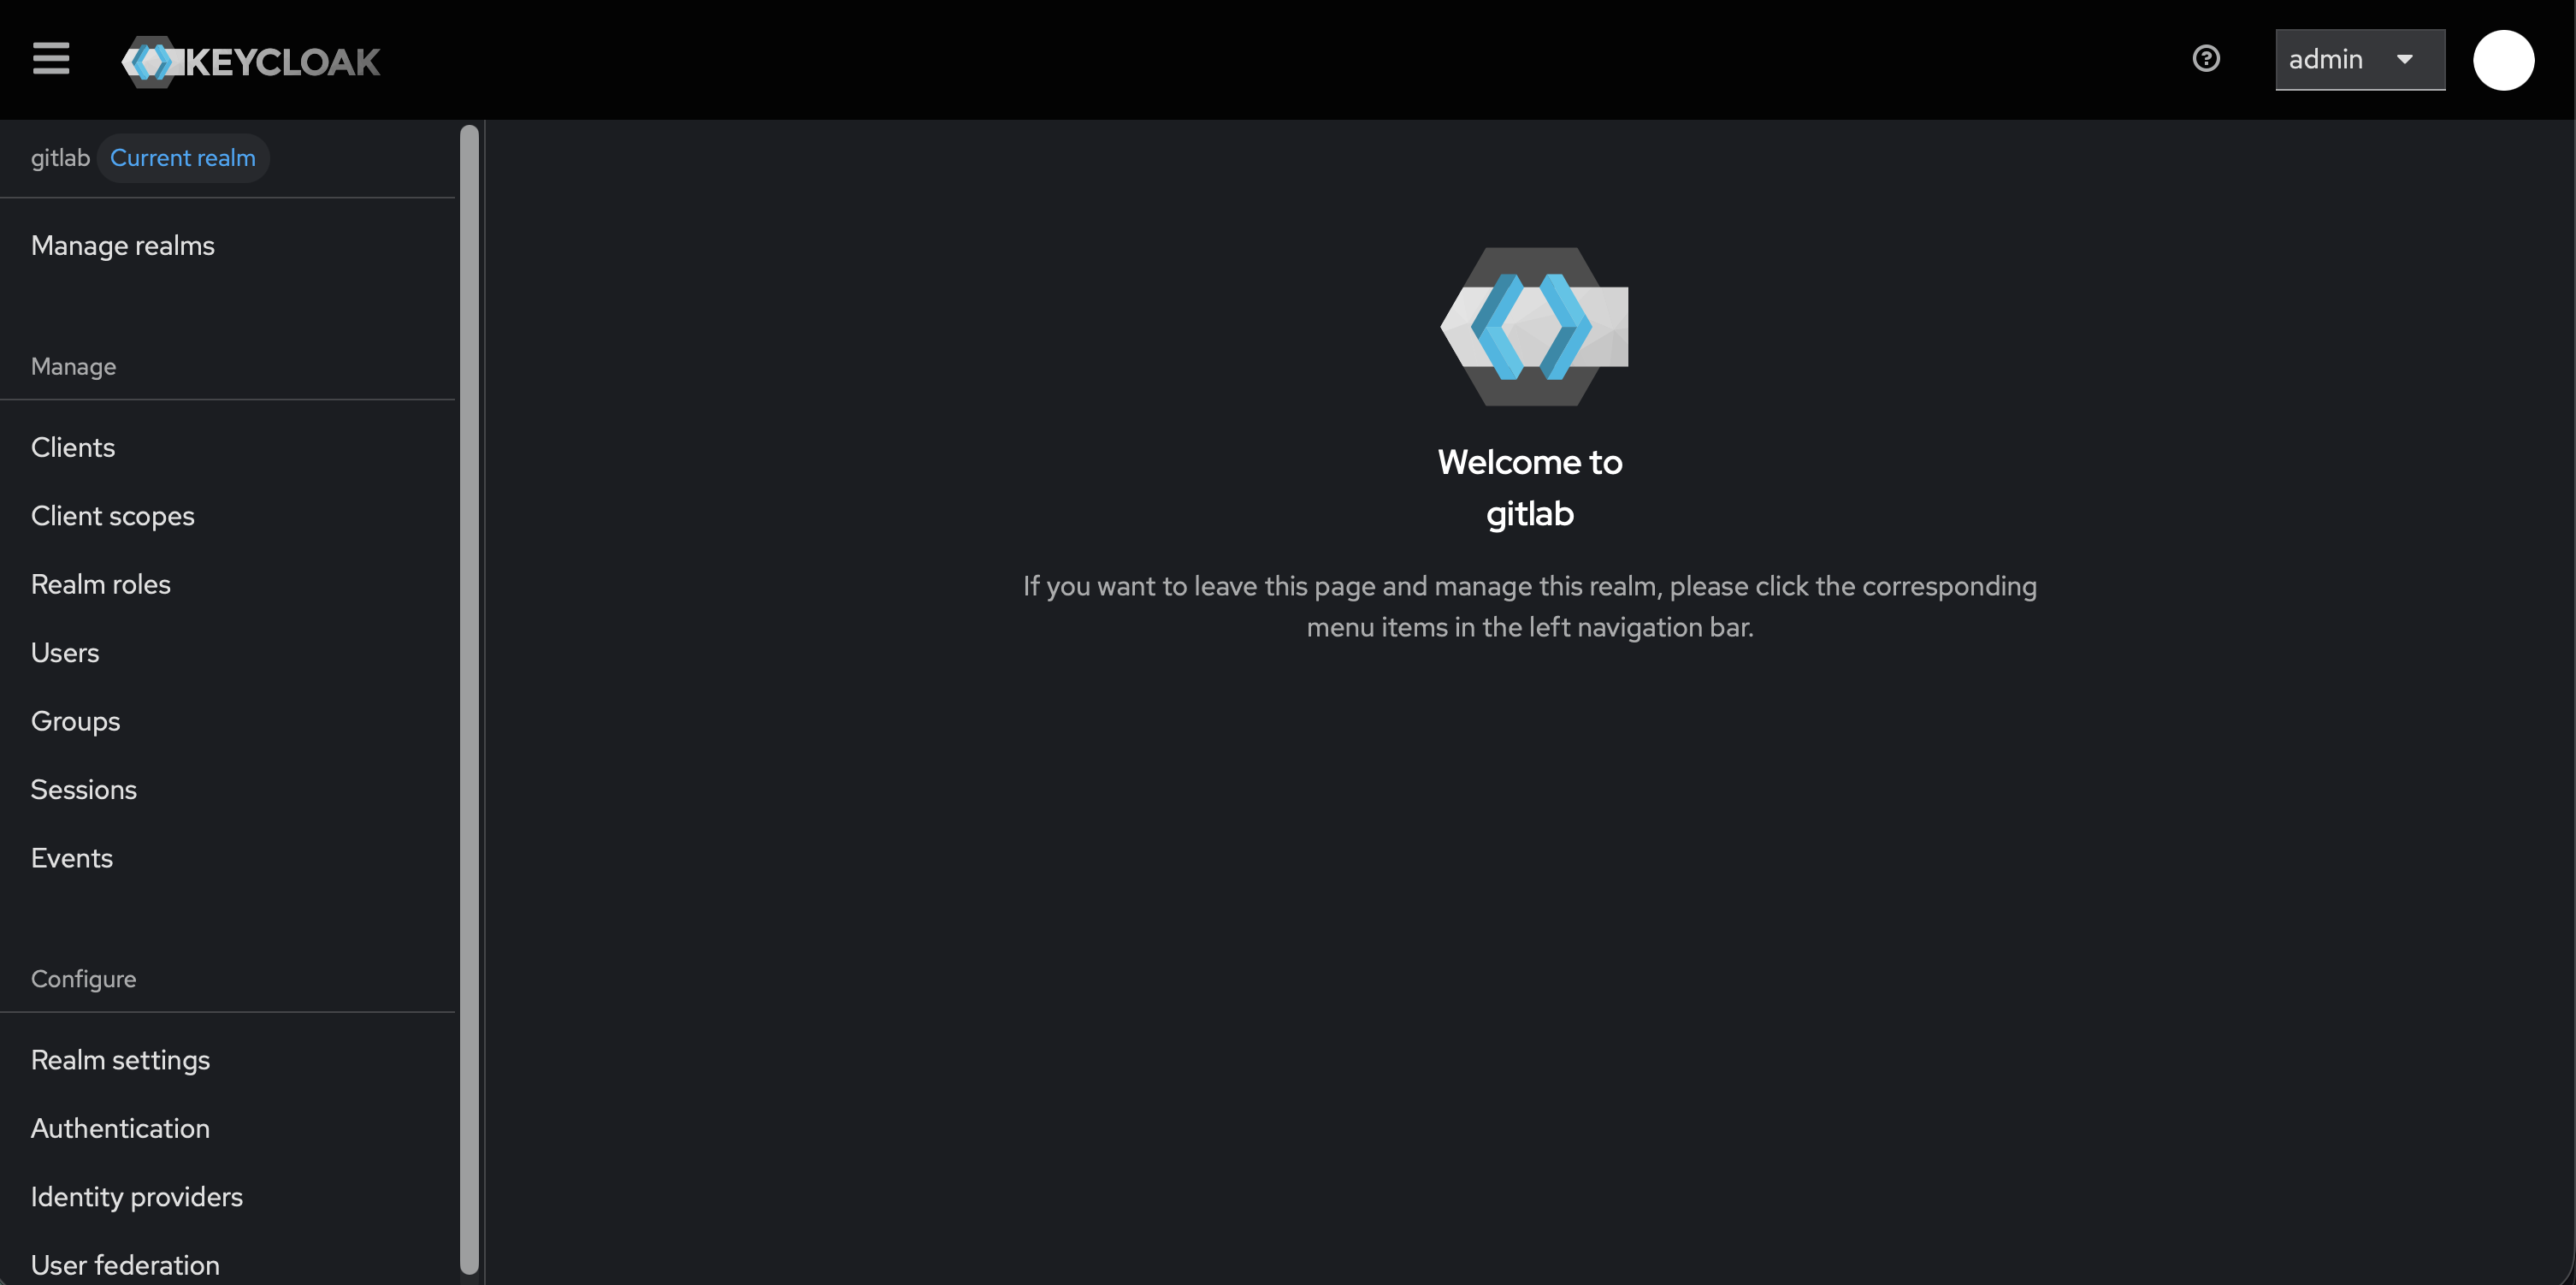
Create a realm named gitlab by clicking the realm dropdown in the top-left and selecting Create realm. Never use the master realm for applications — it’s for Keycloak administration only. Once created, you’ll be switched into the new realm:
WebAuthn Passwordless Policy Link to heading
Go to Authentication → Policies → WebAuthn Passwordless Policy:
- User Verification Requirement:
Required - Authenticator Attachment:
Not specified(shown asNo Preferencein older Keycloak versions)
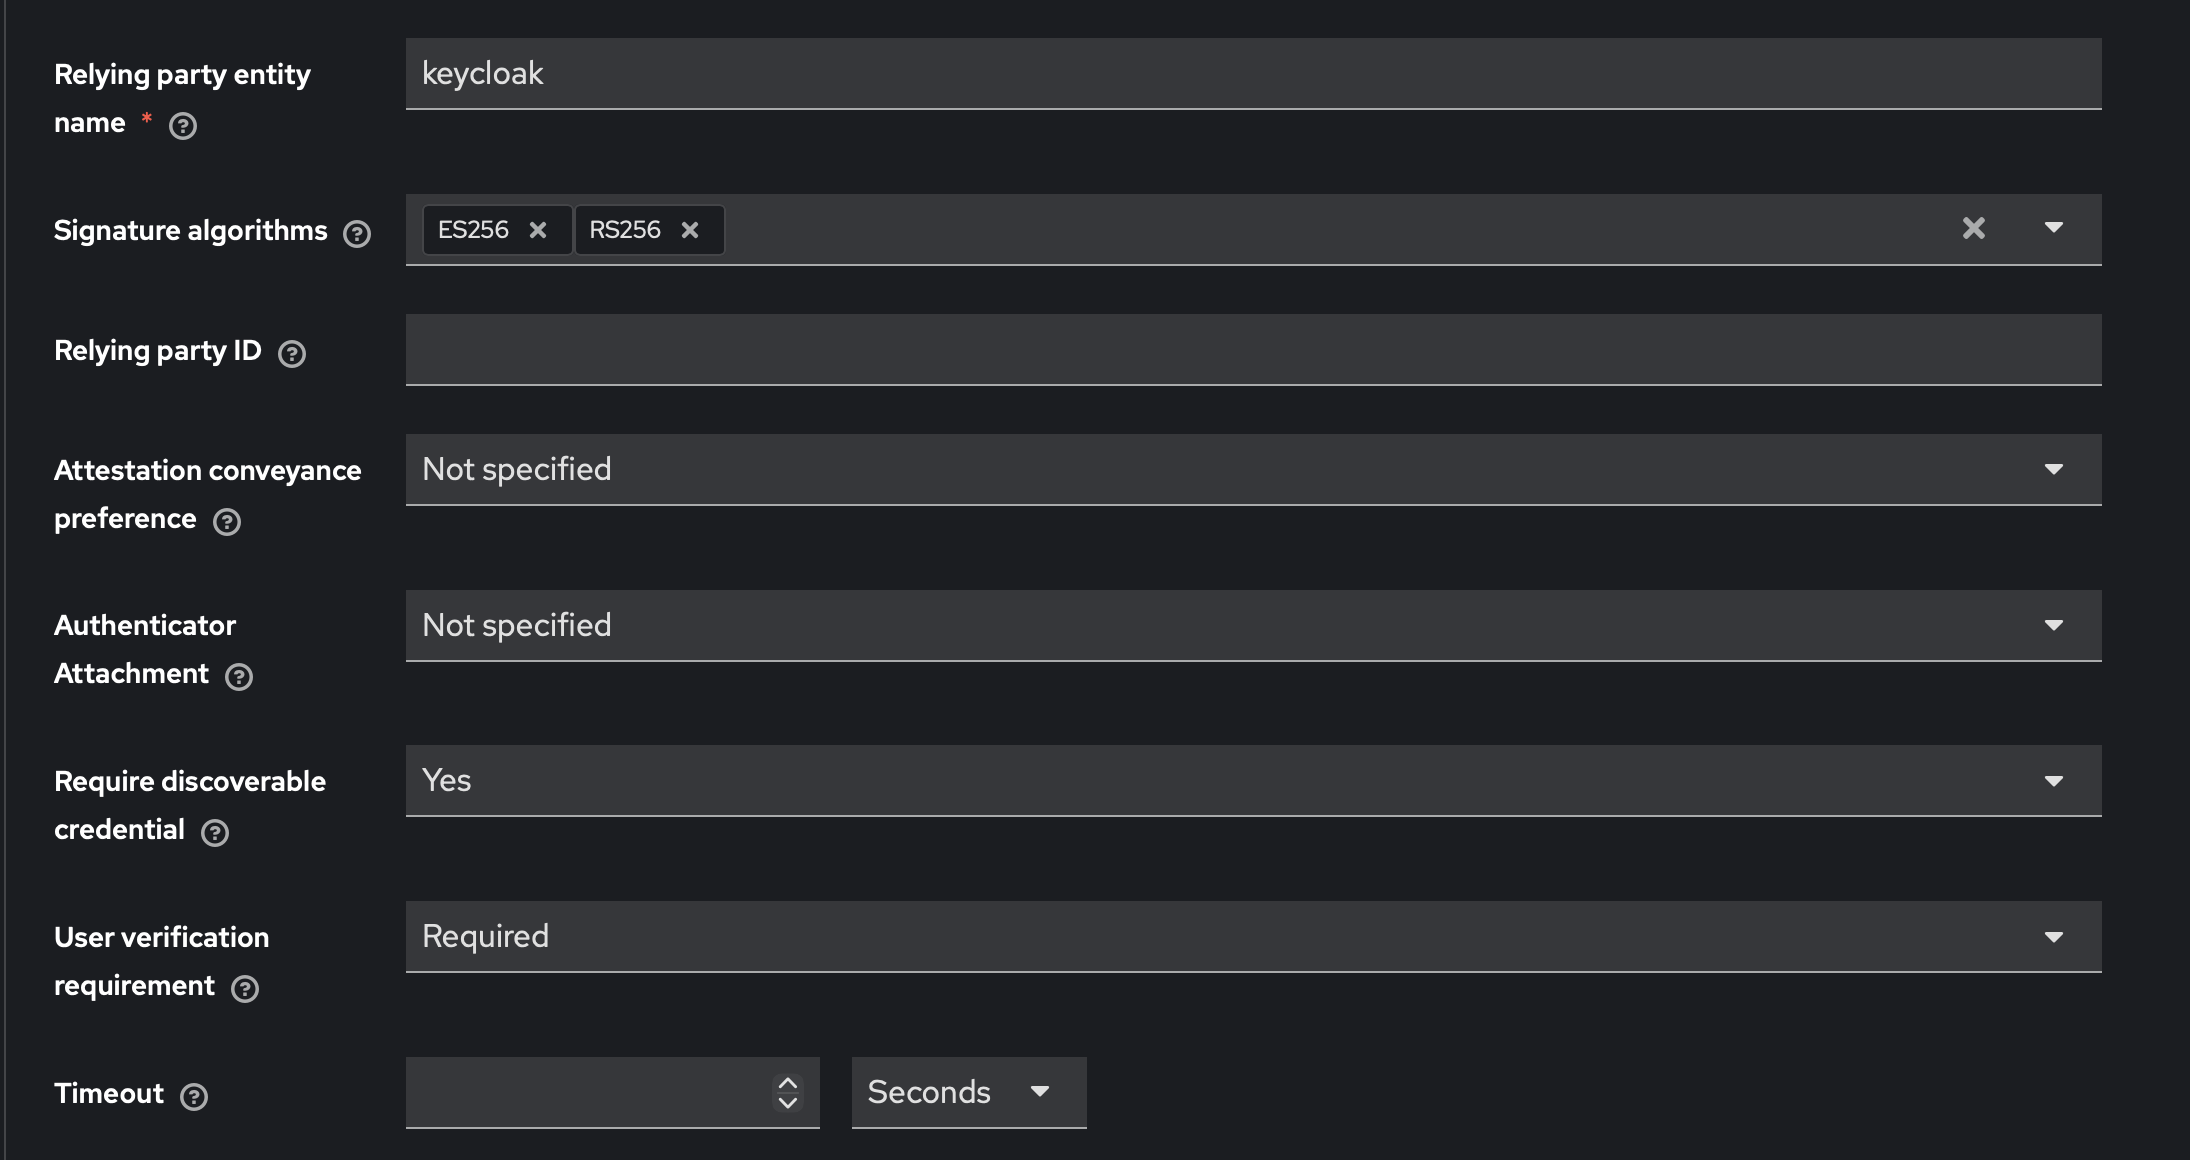
Leaving Authenticator Attachment unspecified lets users register either a YubiKey or a platform authenticator (Touch ID, Face ID, Windows Hello). Setting it to Cross-Platform restricts to hardware keys only — useful if you want to enforce YubiKey exclusively.
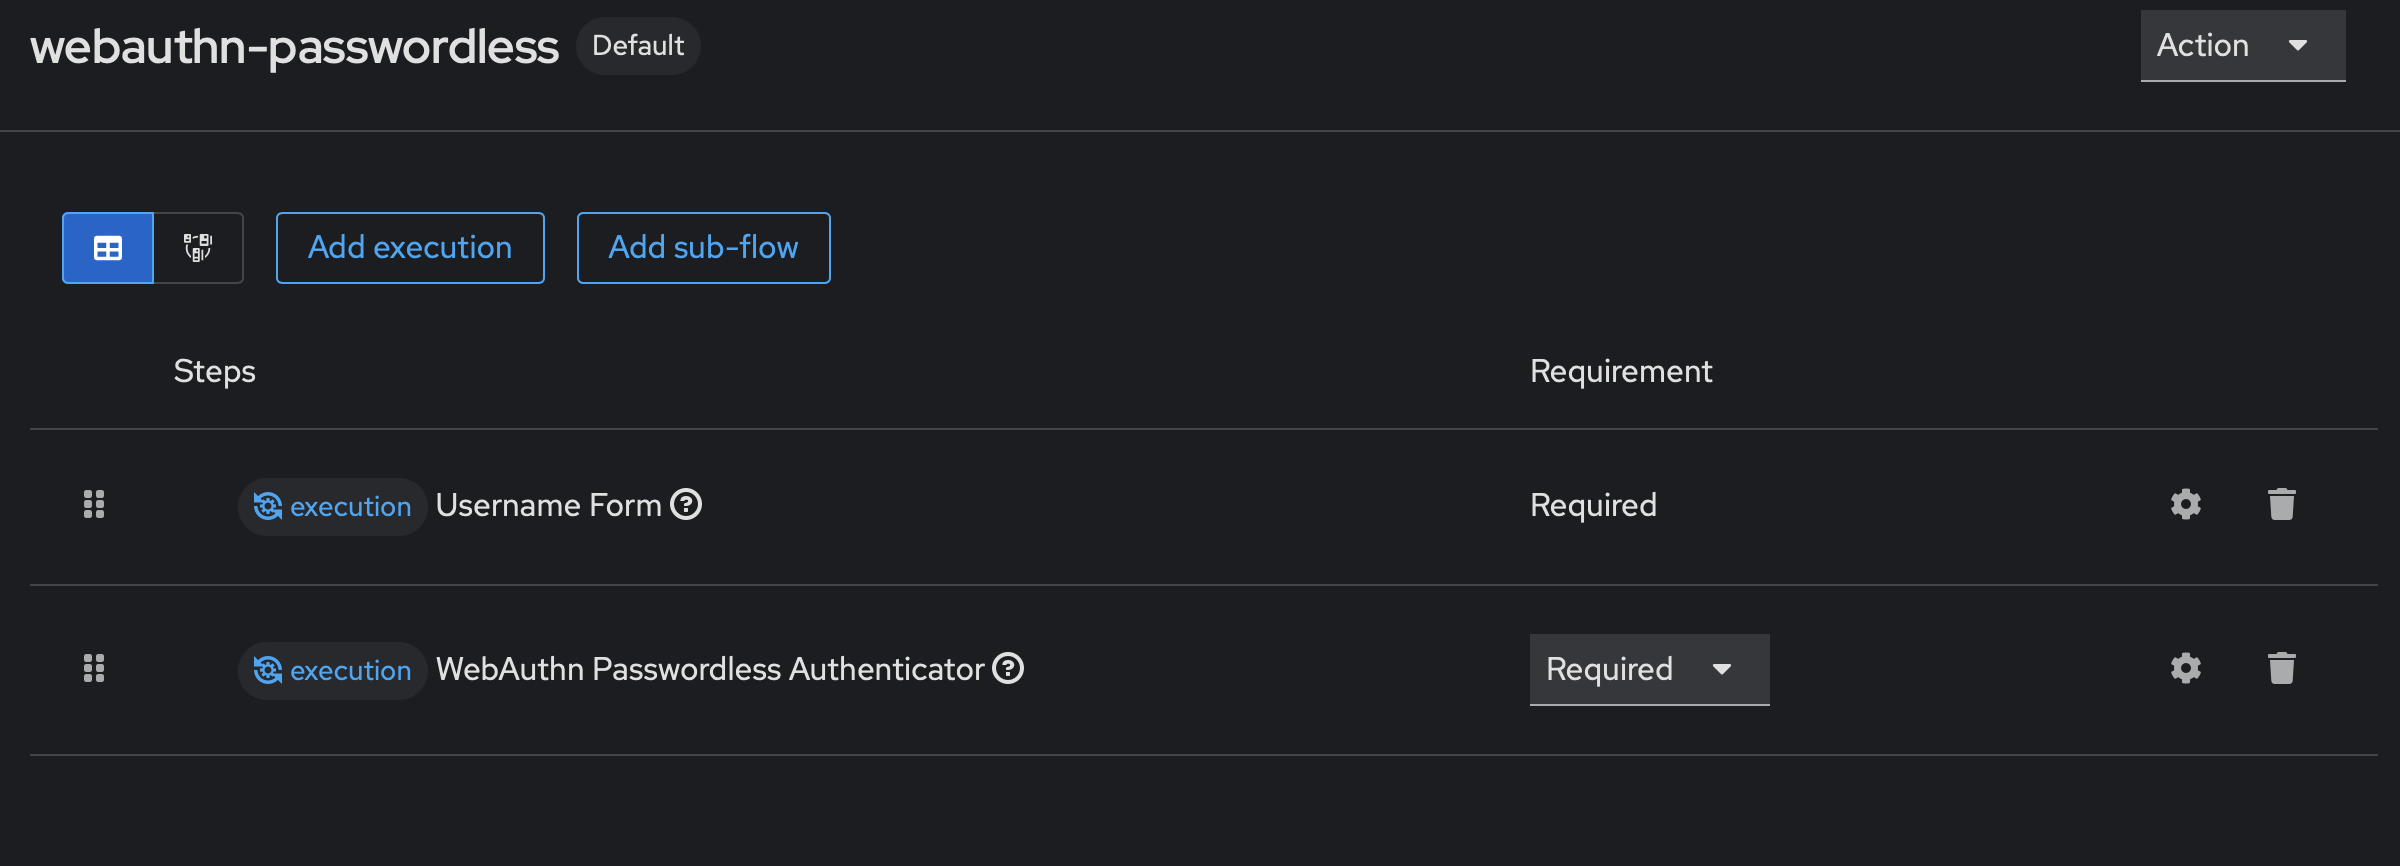
Passwordless Browser Flow Link to heading
Go to Authentication → Flows → Create flow:
- Type:
Basic - Name:
webauthn-passwordless
Add two executions:
- Username Form → Required
- WebAuthn Passwordless Authenticator → Required
Then bind this flow under Bindings → Browser flow → webauthn-passwordless.
Gotcha (Keycloak 26): After adding executions, verify the Requirement column shows Required for both steps. Keycloak 26 doesn’t always set this automatically — if it’s blank, click the gear icon and set it manually.
Your completed flow should look like this:
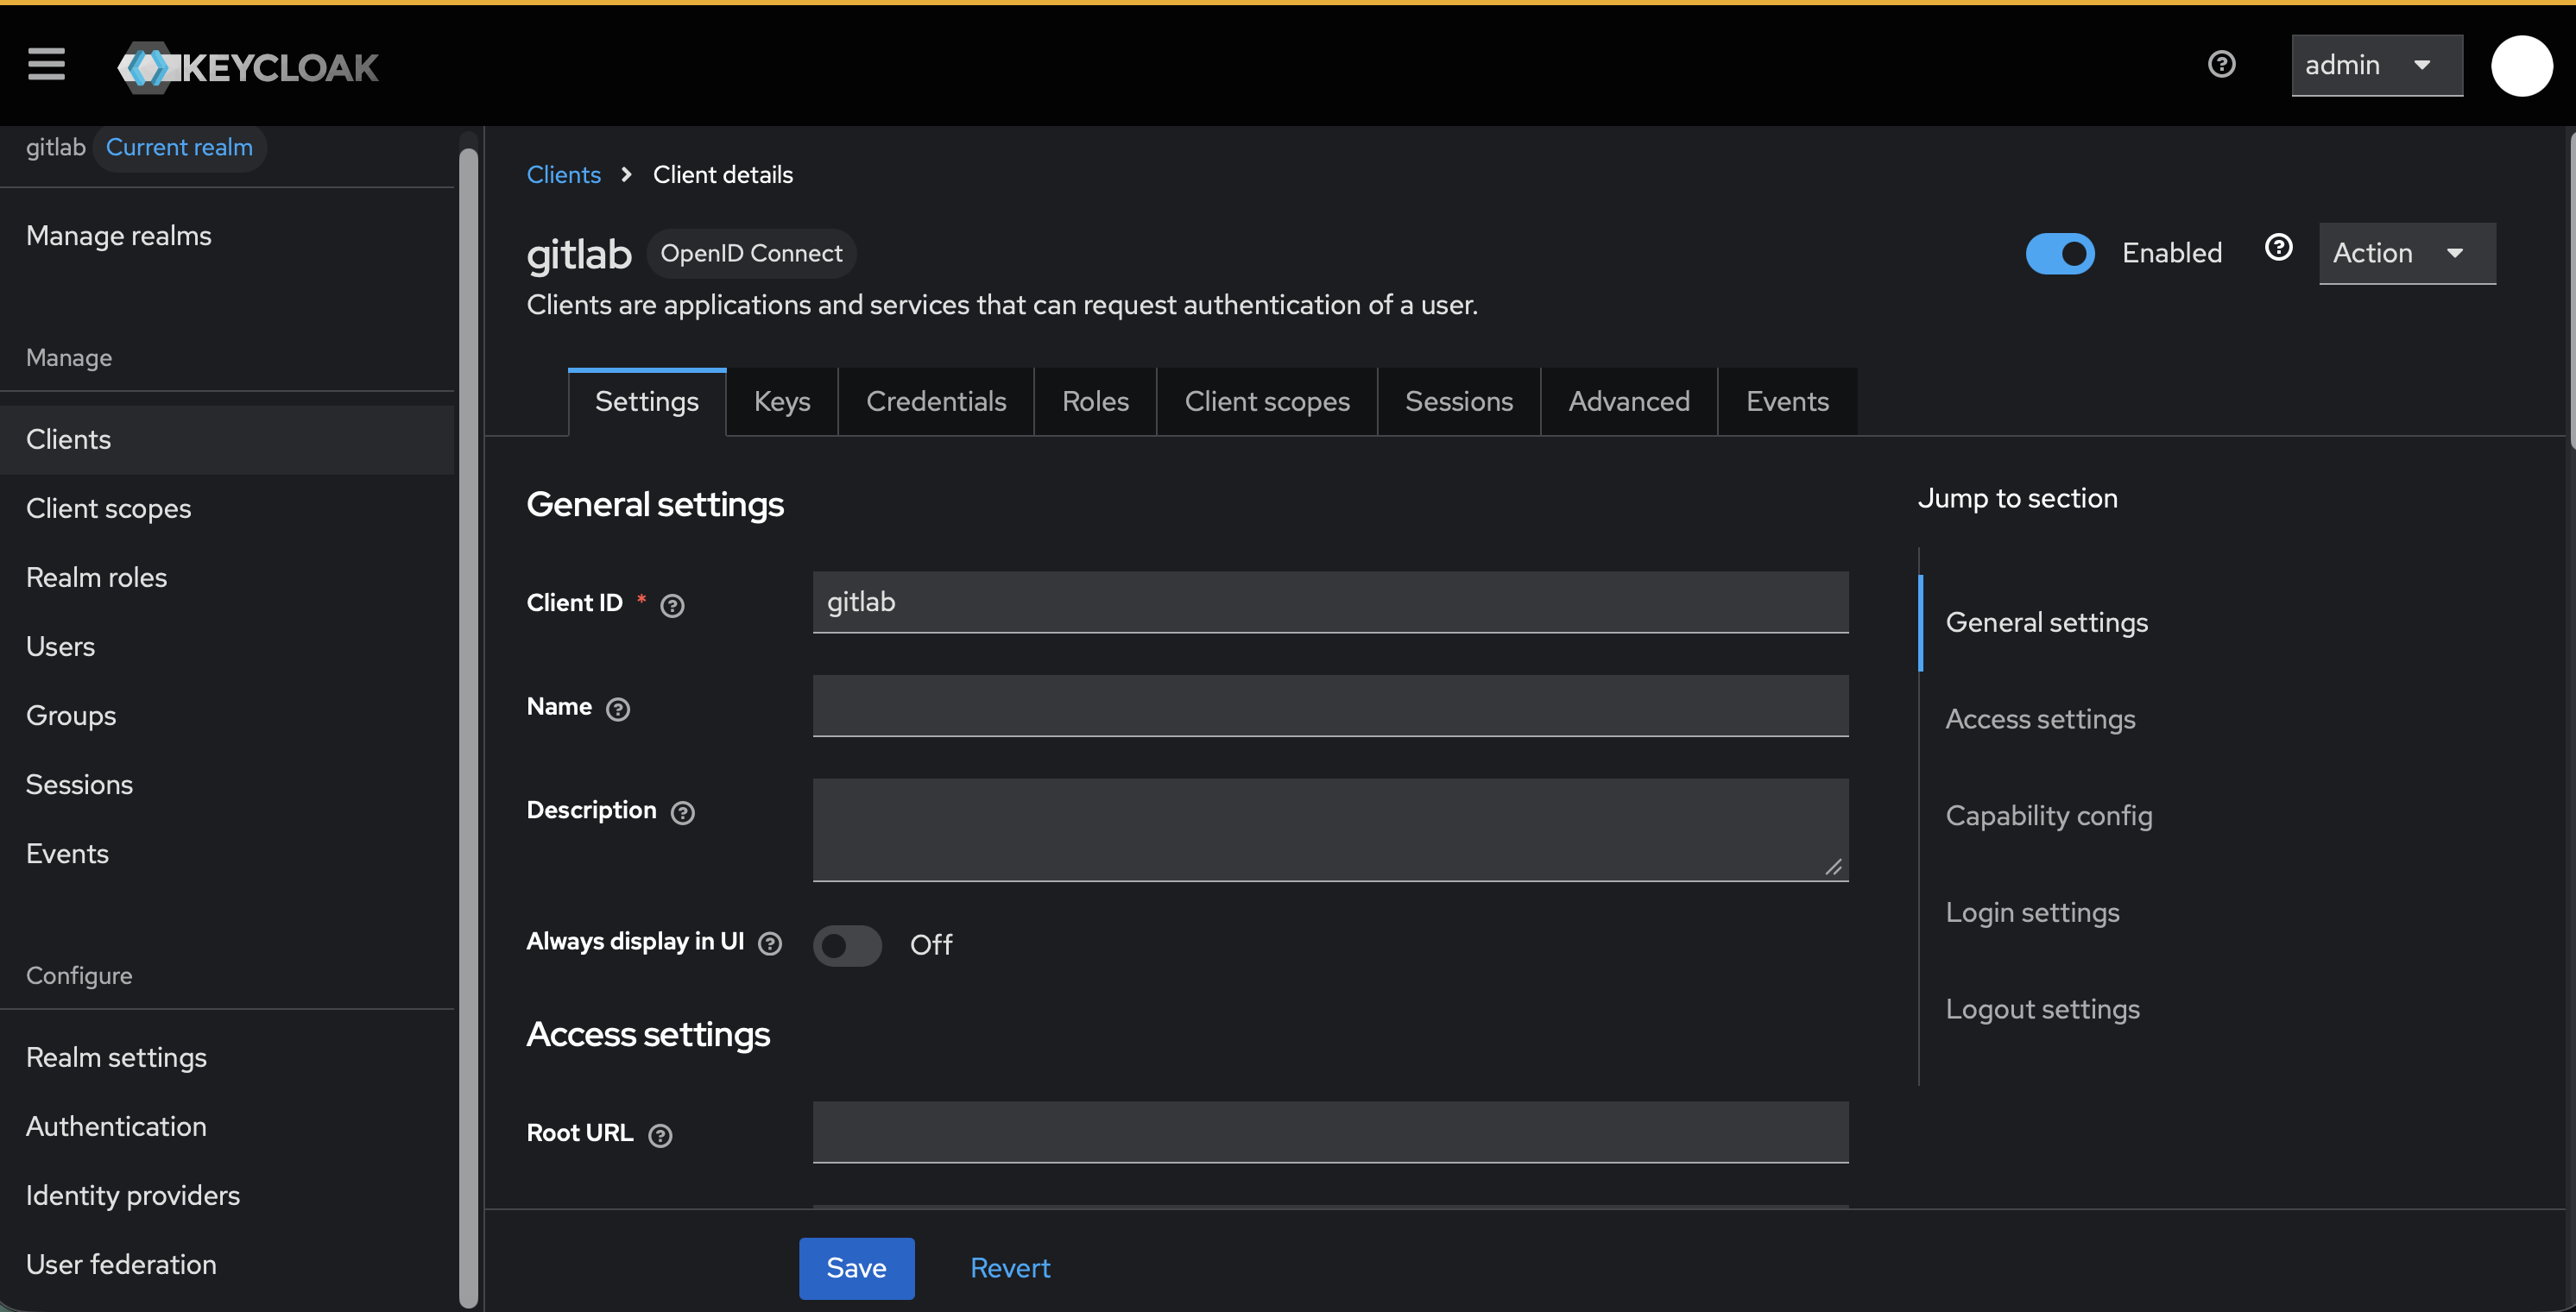
GitLab OIDC Client Link to heading
Go to Clients → Create client:
- Client type: OpenID Connect
- Client ID:
gitlab - Client authentication: ON
- Authorization: OFF
- Authentication flow: Standard flow only
- Valid redirect URIs:
<GITLAB URL>/users/auth/openid_connect/callback
Copy the client secret from the Credentials tab — you’ll need it for gitlab.rb.
Create Users Link to heading
Go to Users → Create new user:
- Set username and email
- Email Verified: ON
- Set a password (Temporary: OFF) — needed for initial account console access
- Required Actions: add
Webauthn Register Passwordless
The required action forces YubiKey registration on the user’s next login to the account console.
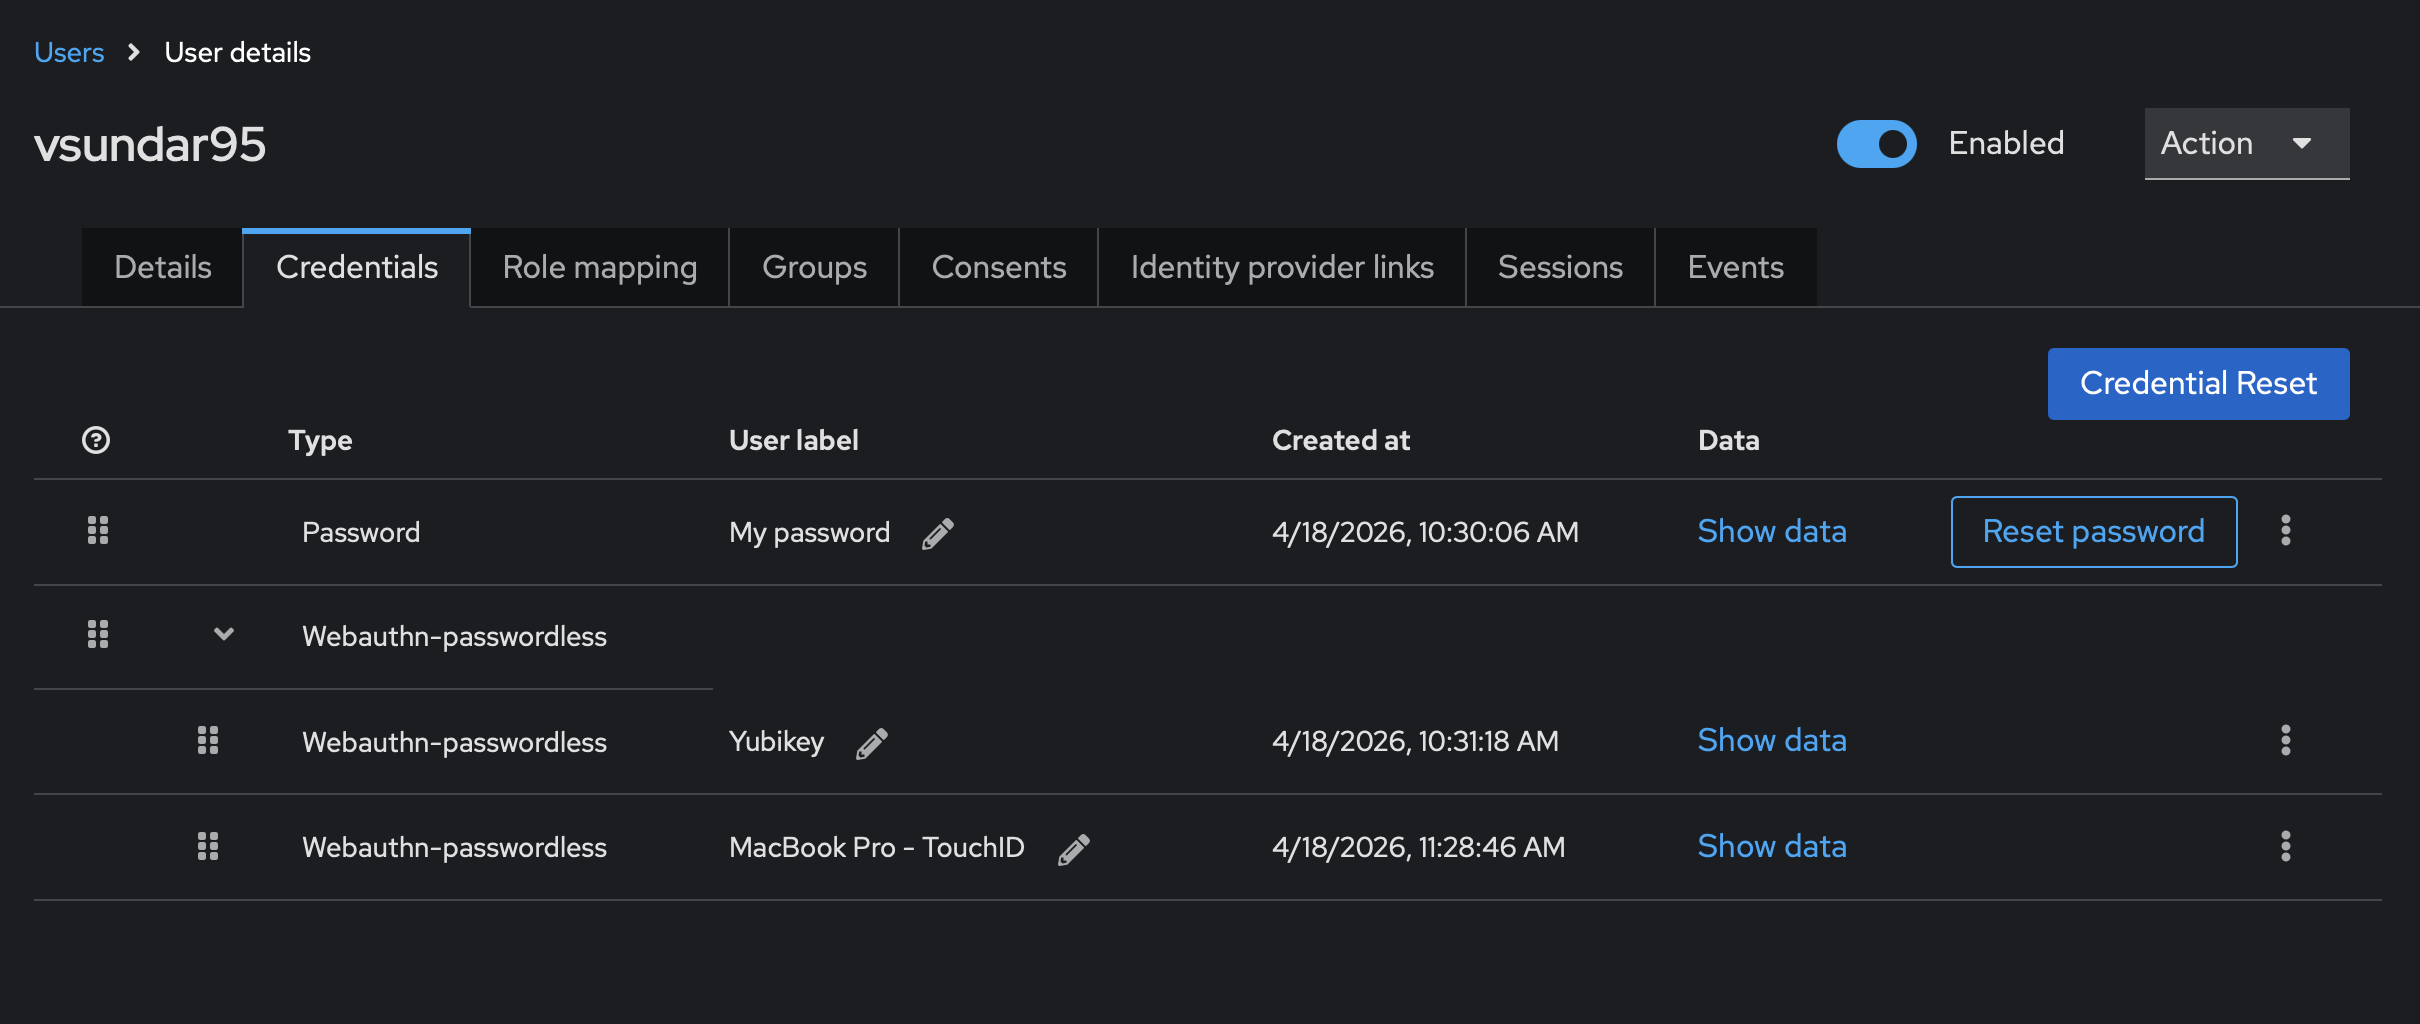
Register Security Keys Link to heading
Have users visit https://<your-keycloak-tailscale-hostname>/realms/gitlab/account, log in with their password, then go to Security Keys → Register and tap their YubiKey.
Gotcha: When first setting up the browser flow, temporarily revert to the default browser flow in Keycloak Bindings. This lets users authenticate to the account console (password-based) to complete YubiKey registration. Switch back to the passwordless flow after everyone has registered their key.
Once registered, the user’s Credentials tab should show both entries under Webauthn-passwordless:
4. Configure GitLab Link to heading
On the Hostinger VPS, edit /etc/gitlab/gitlab.rb:
gitlab_rails['omniauth_enabled'] = true
gitlab_rails['omniauth_allow_single_sign_on'] = ['openid_connect']
gitlab_rails['omniauth_block_auto_created_users'] = false
gitlab_rails['omniauth_auto_link_user'] = ['openid_connect']
gitlab_rails['password_authentication_enabled_for_web'] = true  # keep for fallback

gitlab_rails['omniauth_providers'] = [
  {
    name: 'openid_connect',
    label: 'Keycloak',
    args: {
      name: 'openid_connect',
      scope: ['openid', 'profile', 'email'],
      response_type: 'code',
      issuer: 'https://<your-keycloak-tailscale-hostname>/realms/gitlab',
      discovery: true,
      client_auth_method: 'query',
      uid_field: 'preferred_username',
      client_options: {
        identifier: 'gitlab',
        secret: 'YOUR_CLIENT_SECRET',
        redirect_uri: '<GITLAB URL>/users/auth/openid_connect/callback'
      }
    }
  }
]
sudo gitlab-ctl reconfigure
Note: The Hostinger VM must be on the Tailscale network to reach Keycloak at its
.ts.netaddress.
Login Flow Link to heading
Once everything is wired up, the flow looks like this:
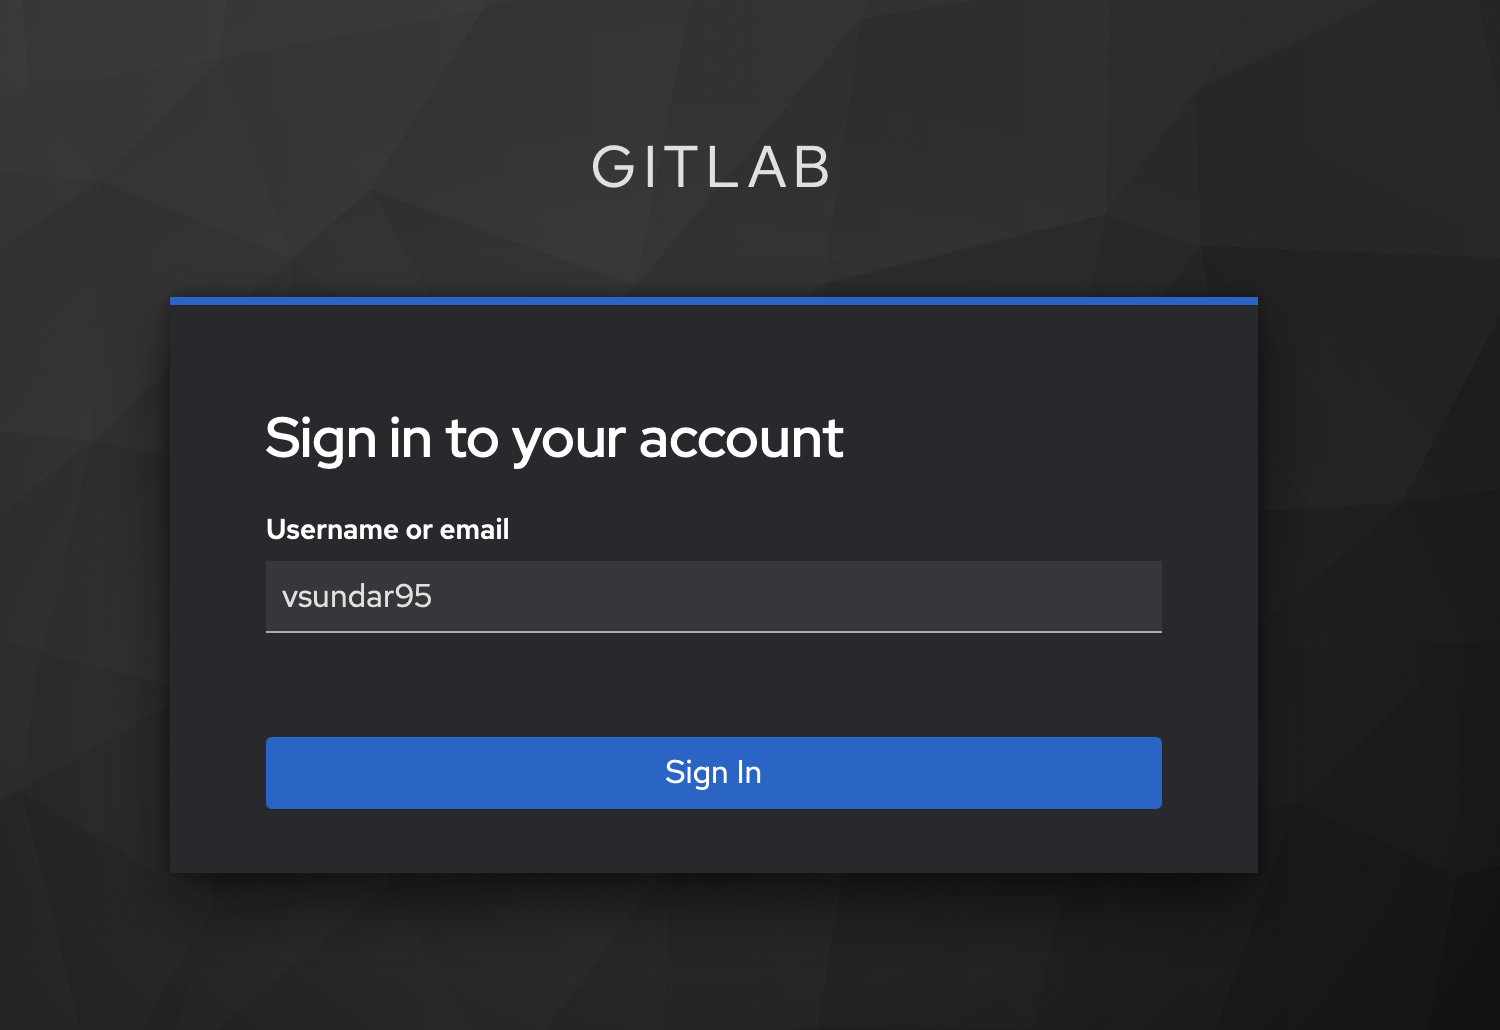
- User visits GitLab → clicks Sign in with Keycloak
- Redirected to Keycloak → enters username
- Keycloak prompts for passkey login
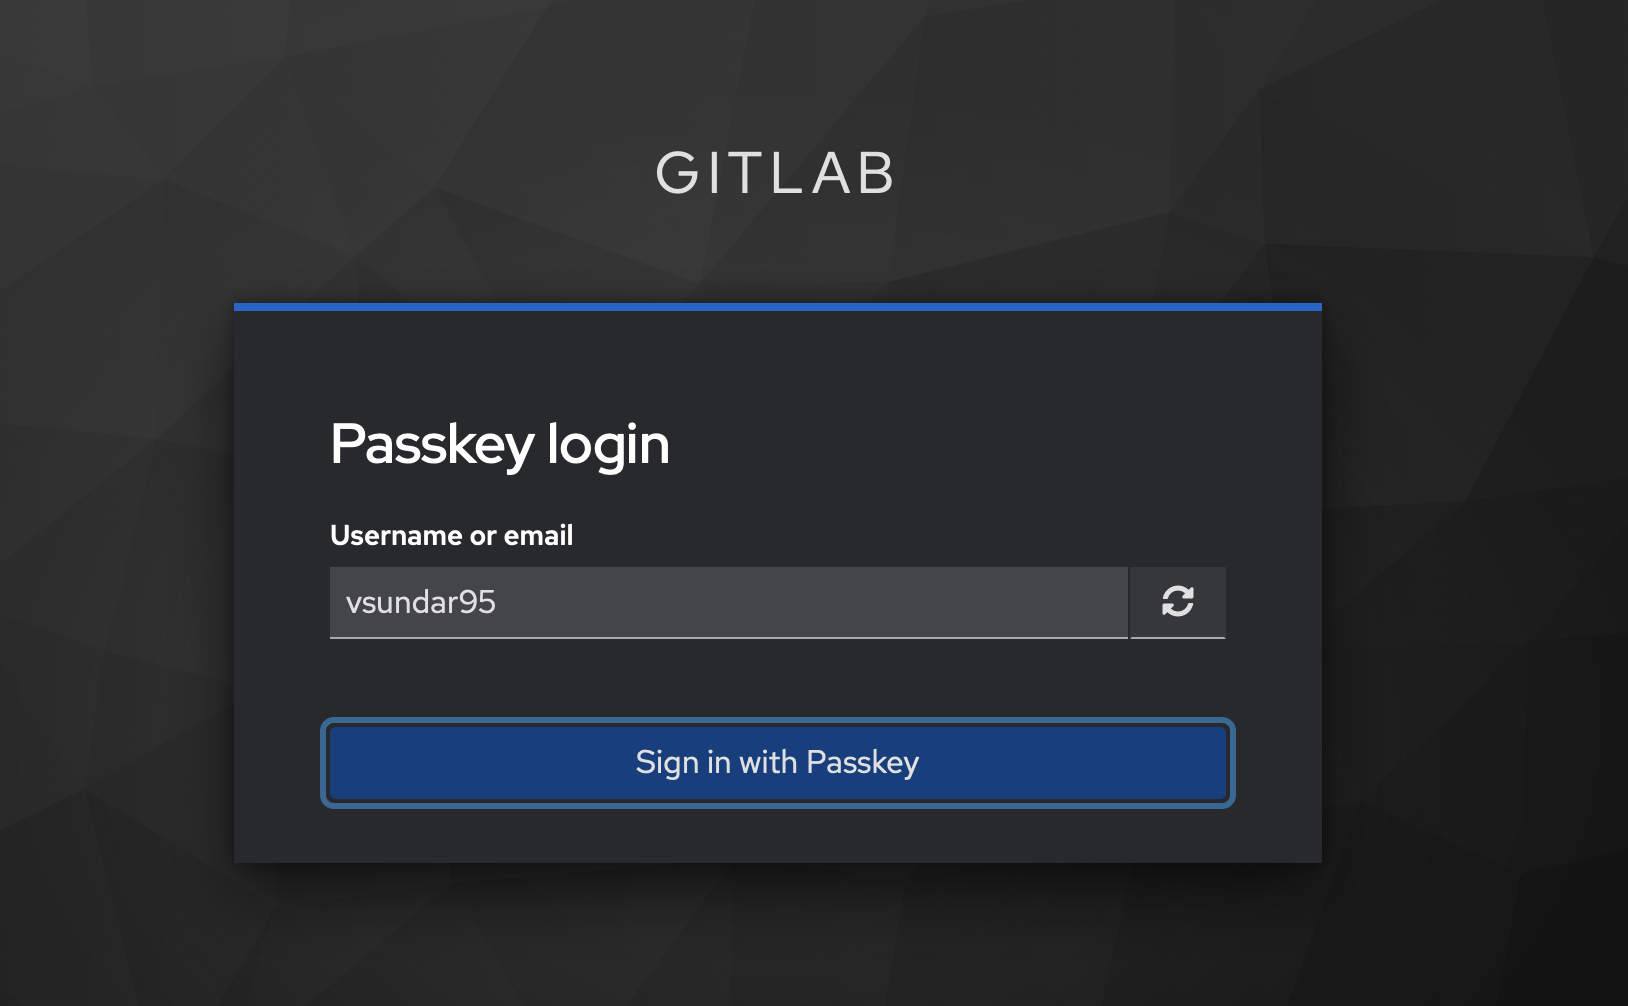
- Browser prompts for Touch ID or YubiKey tap
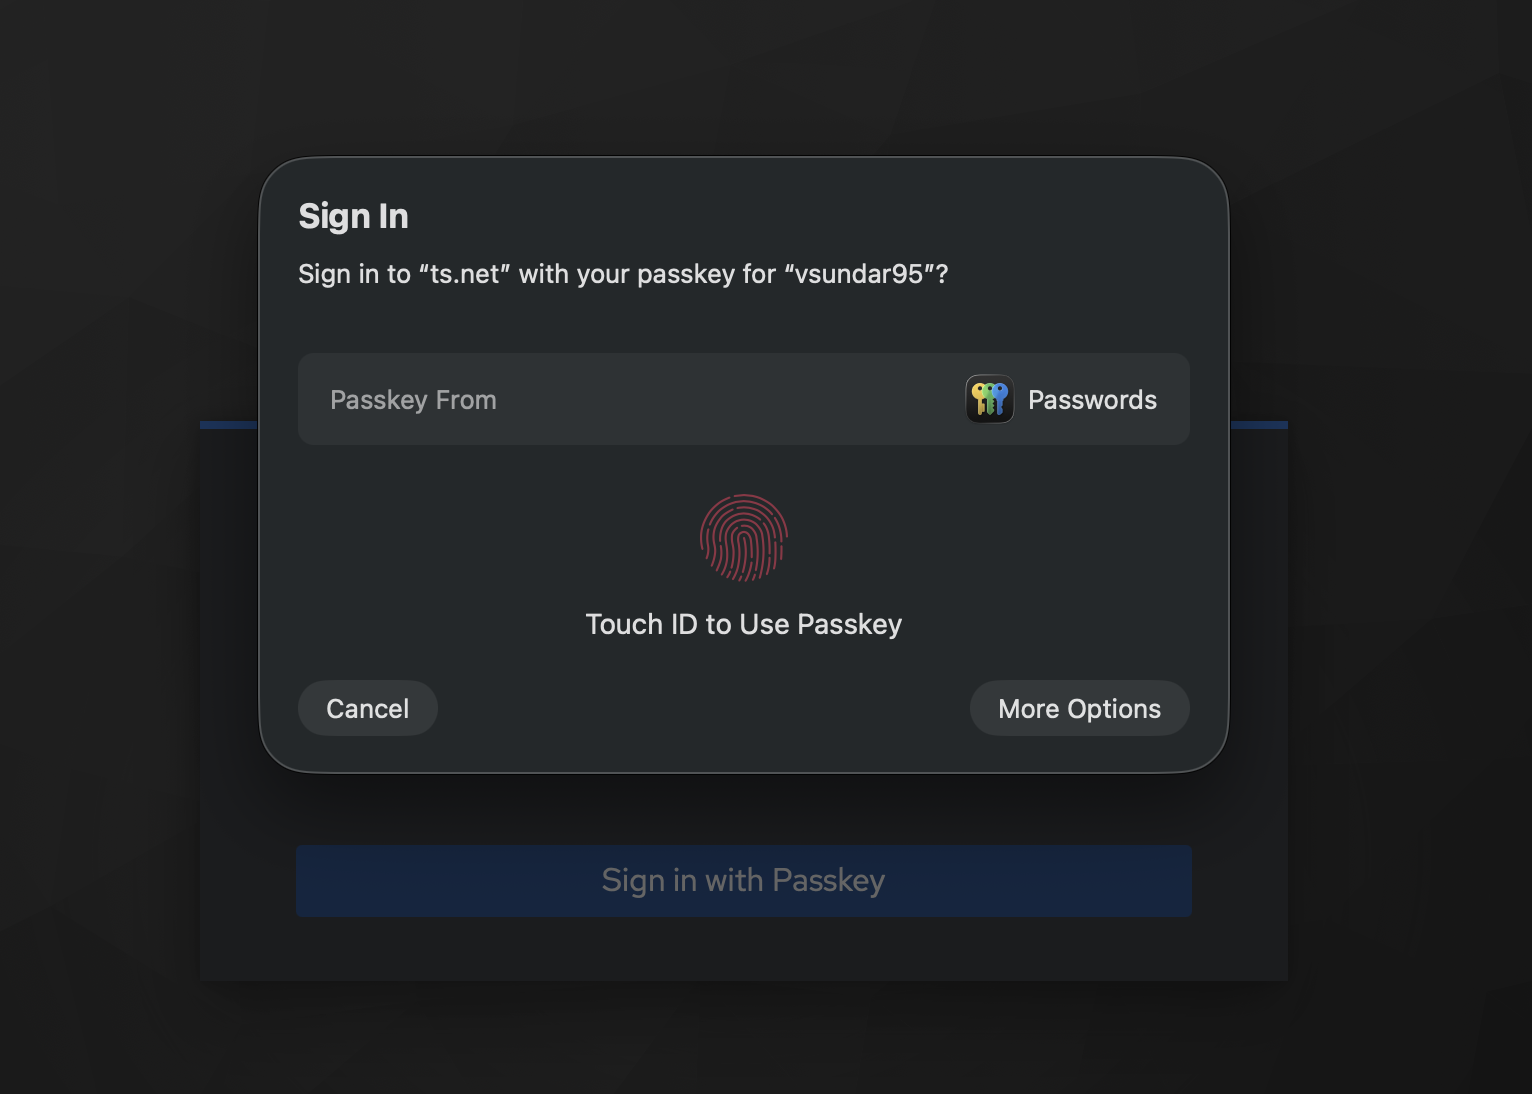
- Keycloak issues an OIDC token → GitLab logs the user in. No password ever entered.
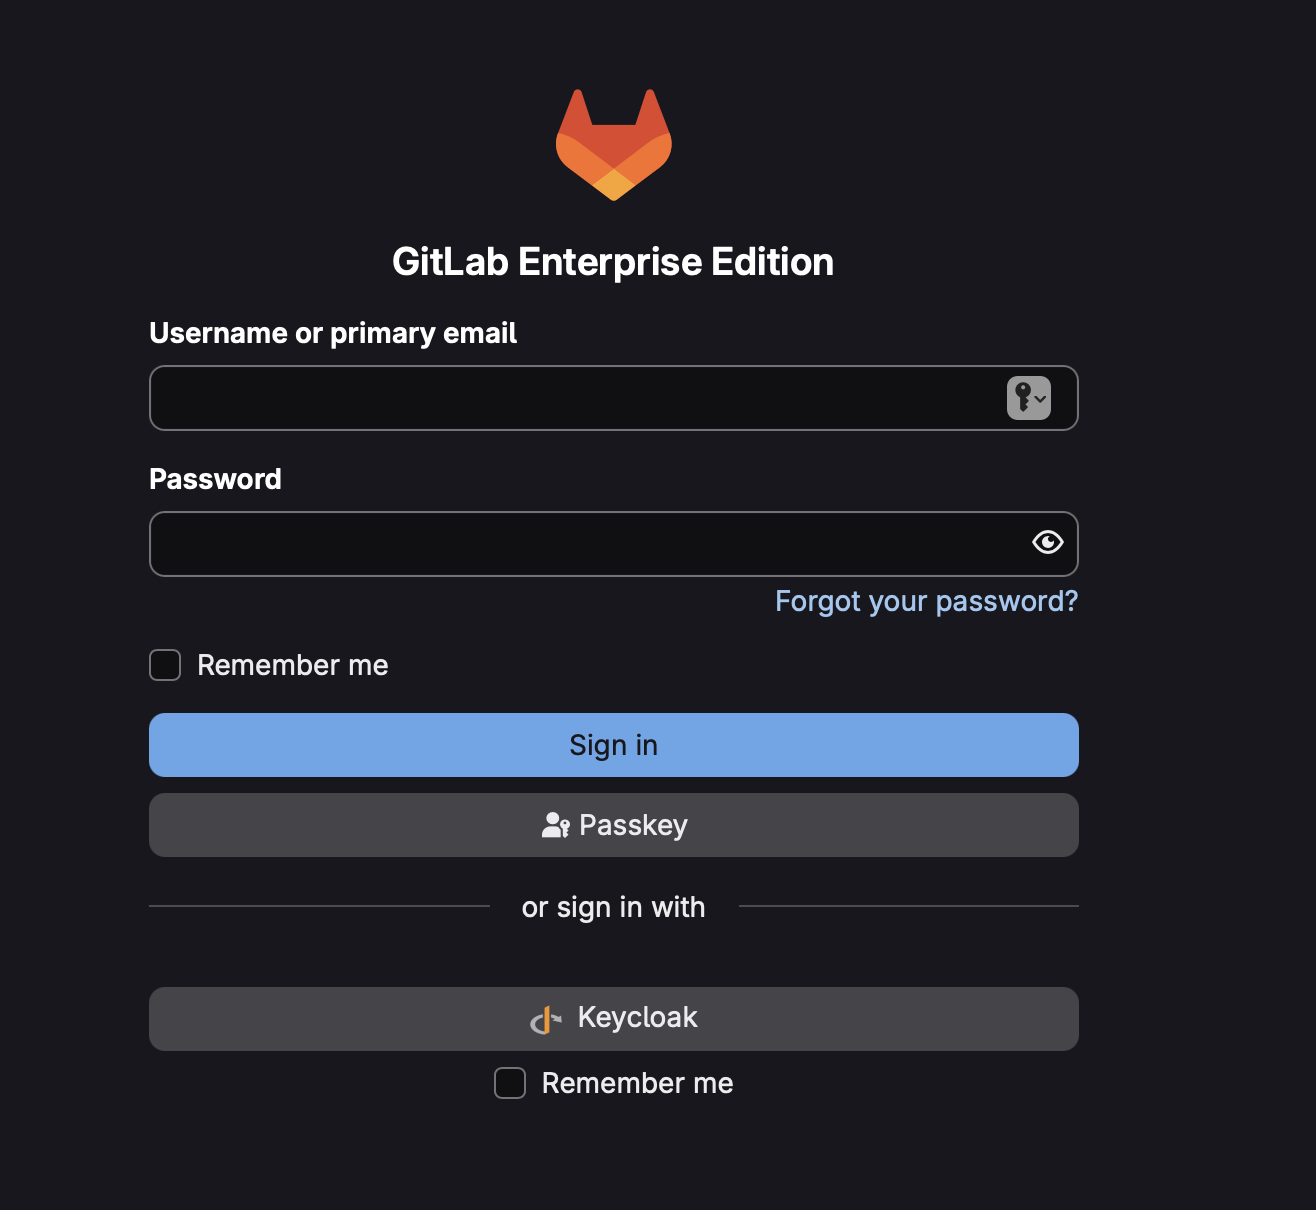
Fallback Login Link to heading
Keycloak being down shouldn’t lock everyone out of GitLab entirely. With password_authentication_enabled_for_web = true, GitLab shows both the “Sign in with Keycloak” button and the standard login form.
SSO-created users won’t have a GitLab password by default, so I send new users this onboarding checklist:
- Accept your GitLab invite and log in via SSO (Keycloak)
- Set a backup password immediately: Profile → Password. This lets you log in if SSO is down.
- Register your YubiKey at
https://<your-keycloak-tailscale-hostname>/realms/gitlab/account→ Security Keys → Register- Optionally register Touch ID as a second credential for convenience on your Mac
- On future logins: click “Sign in with Keycloak” → enter username → tap YubiKey or use Touch ID
YubiKey vs. Touch ID Link to heading
Both are valid WebAuthn credentials. Here’s how they compare:
| YubiKey | Touch ID (Mac) | |
|---|---|---|
| Key storage | Hardware — never extractable | Mac Secure Enclave |
| Malware resistance | Very high | High (but OS-adjacent) |
| Portability | Any device | Tied to one Mac |
| If lost/stolen | Revoke in Keycloak, use backup key | Revoke in Keycloak, use another device |
| Certification | FIDO2 / FIPS certified | Platform dependent |
I recommend registering both: YubiKey as your portable primary credential, Touch ID for convenience on your Mac. Either is far more secure than a password.
WebAuthn authenticator types:
- Platform authenticator — built into the device (Touch ID, Face ID, Windows Hello). Convenient but tied to that device.
- Roaming authenticator — external hardware key (YubiKey, Titan). Works on any device.
- No Preference — Keycloak accepts either. The browser decides what to offer.
The goal from the start was simple: log into GitLab with a tap, not a password. With Keycloak handling authentication behind Tailscale, that’s exactly what this setup delivers — and because Keycloak is never exposed to the public internet, the attack surface stays small. The YubiKey handles the heavy lifting; GitLab just trusts the token.